 Anacortes Exterior
 Why Flounder Bay Siding Wears Differently
Flounder Bay sits close enough to the water that homes here take a different kind of beating than houses inland. Salt-laden air moves through the neighborhood daily, driving rain comes in sideways off Rosario Strait during winter storms, and the shaded, moisture-heavy tree cover common on this side of Fidalgo Island keeps moss and algae growing on siding almost year-round. None of these are dramatic, one-time events. They're a slow, constant load on whatever material is covering your exterior walls, and over years that load adds up faster here than it does on a typical inland Skagit County lot.
That combination — salt, wind-driven moisture, and near-constant dampness in shaded areas — is exactly the profile that separates siding that lasts thirty-plus years from siding that starts failing at year twelve. Replacement in Flounder Bay isn't just a cosmetic upgrade. Done right, it's a chance to correct whatever let the previous siding fail and put something on the house that's actually built for this environment.
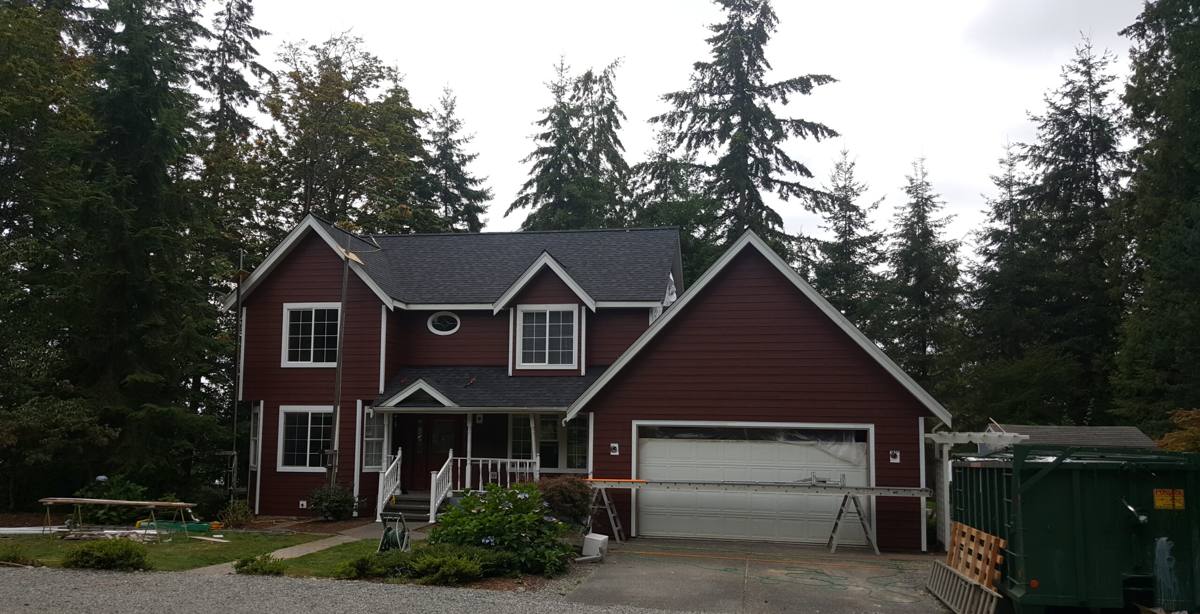
What Salt Air and Moss Actually Do to Siding
Salt Air
Airborne salt is corrosive to metal fasteners, flashing, and trim, and it accelerates the breakdown of paint films and caulk. On wood-based sidings, that means faster cracking, checking, and paint failure. On vinyl, salt residue combines with grime to dull the surface and can make seams and J-channels brittle over time. Fiber cement handles salt exposure far better because it's not an organic material and it doesn't corrode — but the fasteners, flashing, and trim details around it still need to be chosen and installed correctly, or the assembly's weak points become the salt's way in.
Driving Rain
Wind-driven rain doesn't just wet the surface of a wall — it gets pushed sideways and upward into laps, seams, and penetrations that a light rain would never reach. A siding system that only handles vertical rainfall well is a liability in a neighborhood exposed to Rosario Strait weather. What actually keeps a wall dry in these conditions is the drainage plane and flashing detail behind the siding, not just the siding material itself.
Moss and Shade
Where tree cover keeps a wall shaded and damp for long stretches, moss and algae take hold on porous or textured surfaces. Beyond the look of it, sustained dampness against wood-based siding or trim is what invites rot. Fiber cement doesn't feed mold or rot the way wood-based products can, which matters a lot on the shaded, tree-lined lots common around Flounder Bay.
Signs Your Flounder Bay Home Needs Siding Replacement, Not Repair
- Soft or spongy spots when you press on the siding, especially near the bottom courses or under windows
- Paint that keeps failing within a year or two of repainting, even after prep work
- Visible gaps, buckling, or warping in panels or boards
- Persistent moss or dark staining that returns quickly after cleaning
- Cracked or crumbling caulk lines around trim, windows, and corners that keep reopening
- Rising energy bills with no other explanation, which can point to a failing weather barrier behind the siding
- Visible rot at butt joints, corner boards, or anywhere siding meets a horizontal surface
A few of these issues, caught early, can sometimes be addressed with spot repair. But when several show up together, or when the damage traces back to a failed moisture barrier rather than just old material, patching one section only buys a little time before the next section fails the same way.
What a Correct Siding Replacement Actually Involves
Replacing siding is not simply pulling old boards off and nailing up new ones. In a marine-exposed neighborhood like Flounder Bay, the work that happens between the sheathing and the finished siding matters as much as the siding itself.
1. Tear-Off and Inspection
Full removal of the old siding gives us a look at the sheathing underneath — the only real way to find hidden rot, deteriorated framing, or past moisture intrusion before it's covered up again. Any damaged sheathing or framing gets repaired before anything new goes on the wall.
2. Weather-Resistive Barrier
A correctly lapped and sealed weather-resistive barrier is what actually manages bulk water behind the siding. In a spot that sees driving rain off the water, this layer — and the flashing tied into it around every window, door, and penetration — is doing more to keep the house dry long-term than the visible siding material.
3. Flashing and Drainage
Head flashing above windows and doors, kick-out flashing at roof-wall intersections, and proper drainage gaps behind the siding all need to direct water down and out, not let it pool against the wall assembly. This is the detail work that separates a siding job that lasts decades from one that fails from the inside out in under ten years.
4. Installation to Manufacturer Spec
James Hardie fiber cement has specific fastening patterns, clearances, and caulking requirements, and those specs exist for a reason — they're what the product's warranty is built on. Gapping, fastener spacing, and ground clearance all matter more in a wet, salt-exposed environment than they would somewhere dry and inland.
5. Trim, Caulk, and Finish
Corner boards, trim, and caulk joints are finished to shed water, not just to look clean. Factory-finished ColorPlus panels reduce how much of this finish work depends on field-applied paint, which is one less thing that can fail prematurely in salt air.
Why We Install Only James Hardie Fiber Cement
We standardized on James Hardie because it's engineered for exactly the conditions Flounder Bay deals with. It's non-combustible fiber cement, so it doesn't rot, doesn't feed moss and mold the way wood-based products can, and won't warp or delaminate from repeated wetting and drying cycles. Hardie's HZ5 product line is engineered specifically for wet, cold climates, which the Pacific Northwest coast qualifies as. The factory-applied ColorPlus finish holds up better to UV and salt exposure than field-applied paint, and it comes with its own finish warranty separate from the substrate warranty.
We don't install LP SmartSide, vinyl, Cemplank, Allura, or unfinished wood siding. That's not a knock on every homeowner who has one of those products — it's that our crews build our process, our detailing, and our warranty backing around one system we know inside and out, and we'd rather do one thing at the level this climate demands than spread our standards across several.
What Affects the Cost of a Flounder Bay Siding Replacement
| Factor | Why It Matters |
|---|---|
| Square footage and wall complexity | More corners, dormers, and roof-wall intersections mean more flashing and cutting labor |
| Condition of the sheathing underneath | Rot or moisture damage found during tear-off adds repair scope before new siding goes on |
| Number of existing siding layers | Removing multiple layers of old material takes more labor than a single layer |
| Siding profile chosen | Lap siding, shingle-style panels, and vertical panel systems differ in material and install time |
| Trim and color package | Custom trim details and color choices affect material cost and finish labor |
| Site access | Waterfront and sloped lots common near the bay can affect staging and scaffolding needs |
We walk every one of these factors with you on-site before giving a number — nobody should get a real quote off a phone call for a job this exposed to site-specific conditions.
Our Process for a Flounder Bay Project
- On-site assessment — we look at your current siding, check for moisture damage, and evaluate exposure to wind and rain based on your home's orientation
- Written estimate — a clear scope of work and cost breakdown, no surprise add-ons buried in fine print
- Tear-off and sheathing check — old siding comes off, and we address anything we find underneath before covering it back up
- Weather barrier and flashing install — the part of the job that determines whether the wall stays dry for the next several decades
- Hardie installation — fastened and gapped to manufacturer spec, with attention to the trim and caulk details that matter most in salt air
- Final walkthrough — we go over the finished work with you before calling the job done
What to Ask Before Hiring Anyone for Siding Work Here
- Are they familiar with installing over a marine-exposed weather-resistive barrier and flashing system, or do they mostly work inland?
- Do they follow manufacturer fastening and clearance specs, or eyeball it?
- Will they inspect and repair sheathing found during tear-off, or just cover over what's there?
- Are they certified or experienced specifically with James Hardie products, not just "siding" in general?
- What does the warranty actually cover — material, finish, and labor — and who backs it?
- Can they explain, in plain terms, how water is meant to move behind your specific wall assembly?
A crew that already works this side of Anacortes has usually already learned these lessons the hard way on other homes nearby — which spots hold moisture longest, which orientations take the worst of winter storms, and which details actually hold up here versus on paper.
Why Local Experience in Flounder Bay Matters
A siding system that's correct for a dry inland lot isn't automatically correct for a lot exposed to Rosario Strait weather and heavy shade. Crews that work this part of Skagit County regularly develop a feel for which walls need extra flashing attention, which sides of a house take the worst of the driving rain, and how much clearance and drainage detail actually holds up once winter storm season sets in. That's the kind of judgment that only comes from doing this work on homes like yours, in this specific environment, repeatedly — not from a general siding crew working from a standard checklist built for a different climate.
If your siding is showing wear, or you're just planning ahead for a home in Flounder Bay, we're happy to take a look and give you a straightforward, no-pressure estimate on what a correct James Hardie replacement would involve for your specific house.