 Anacortes Exterior
 Flounder Bay's Shoreline Climate Is Harder on Siding Than Most Homeowners Realize
Flounder Bay sits on the saltwater side of Fidalgo Island, in a stretch of Anacortes where the weather off the water shapes how a house ages. Homes here deal with three things at once, year-round: salt-laden air moving in off the bay, driving rain that comes in sideways during winter storms, and a long, damp moss season that can run from October through May. Any one of those is manageable. All three together, hitting the same wall assembly for decades, is what separates a siding job that lasts from one that doesn't.
Salt air is corrosive to exposed metal fasteners and trim, and it accelerates the breakdown of finishes that aren't engineered for marine exposure. Driving rain doesn't just wet the surface of a wall — wind-driven moisture gets pushed up under laps and around openings if the flashing and water-resistive barrier underneath weren't detailed correctly. And moss doesn't just grow on roofs; it takes hold on north-facing and shaded siding runs too, holding moisture against the substrate long after a storm has passed. Skagit County's marine climate means Flounder Bay properties see this cycle repeat dozens of times a year, every year.
This is the backdrop for every siding decision a homeowner in this neighborhood makes. It's not about picking a color and moving on — it's about picking a product and an installation approach that can actually stand up to what this specific location throws at a wall.
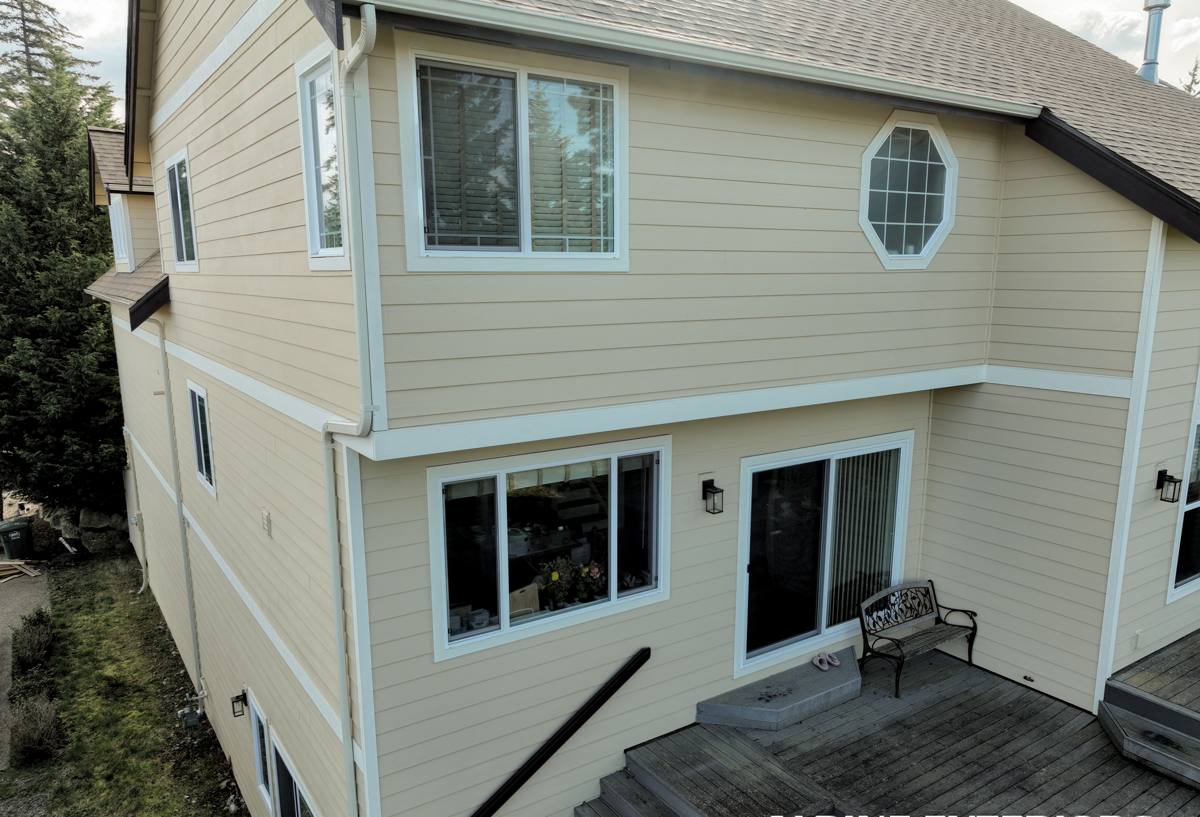
What a Correct Siding Installation Actually Involves Here
A siding job that holds up on Flounder Bay's waterfront exposure isn't just about the panels you see. Most of what determines whether a home stays dry and looks good in ten years happens underneath the finish material, before a single piece of siding goes up.
The Water-Resistive Barrier and Flashing
Every wall needs a continuous drainage plane behind the siding — a weather-resistive barrier that's lapped correctly, sealed at every penetration, and paired with proper flashing at windows, doors, and any horizontal trim. On a home exposed to driving rain off the bay, gaps in this layer are where water gets in, and once it's behind the siding, it doesn't dry out quickly in our climate. This step is invisible once the job is done, which is exactly why it matters to have a crew that won't cut corners on it.
Fastening and Clearances
Fastener pattern, penetration depth, and the gap left at the bottom of the wall for drainage and ventilation all affect how the assembly handles moisture over time. Corrosion-resistant fasteners matter more here than in an inland Skagit Valley installation, simply because of the salt content in the air. Clearance from grade, decks, and roof lines also needs to be correct — too tight, and moss and standing moisture get a foothold right where the wall is most vulnerable.
Caulking and Joint Treatment
Joints, corners, and butt seams need the right sealant, applied correctly, or they become the first failure point. On a coastal property, UV and salt exposure break down poor-quality caulking faster than most homeowners expect, so joint detailing has to be done to hold up over years, not just pass a walk-through.
Why We Install Only James Hardie Fiber Cement Siding
We standardized on James Hardie fiber cement for every home we side, including here in Flounder Bay, and we don't install vinyl, LP SmartSide, or other fiber cement alternatives. That's a deliberate choice, not a default.
Fiber cement is non-combustible, dimensionally stable, and doesn't absorb and release moisture the way wood-based products can — a real advantage in a location that stays damp for much of the year. James Hardie's HZ5 product line is specifically engineered for climates with high moisture exposure, which fits Flounder Bay's conditions better than a general-purpose siding line. The factory-applied ColorPlus finish is baked on under controlled conditions and holds color and adhesion far better over time than field-applied paint, which matters when a wall is exposed to salt air and UV together.
We're not going to tell you every other siding product is worthless — vinyl and engineered wood both have legitimate uses and reasonable price points. But for the moisture load, salt exposure, and long service life we want to stand behind on a Flounder Bay home, fiber cement done right is the product we're willing to put our name on.
Our Installation Process
The steps below are the same ones we follow on every Flounder Bay project, adjusted for the specific exposure and layout of the house.
- Site and wall assessment — we look at wind exposure, sun/shade patterns, drainage around the foundation, and the condition of the existing sheathing before quoting anything.
- Removal of old siding and inspection — we don't install over unknown conditions. If there's rot, hidden moisture damage, or a failed barrier underneath, we address it before new siding goes on.
- Water-resistive barrier installation — a continuous, properly lapped barrier goes on the whole wall, with all penetrations sealed.
- Flashing at every opening — windows, doors, and horizontal trim all get flashed to shed water outward, not into the wall.
- James Hardie panel or lap installation — installed to manufacturer spec for fastener spacing, clearance, and joint treatment.
- Trim, caulking, and finish detail — corners, joints, and transitions are sealed with materials suited to marine exposure.
- Final walkthrough — we go over the finished job with the homeowner before calling it done.
Signs Your Current Siding Is Already Losing the Fight
Homeowners in Flounder Bay often notice a problem developing well before it becomes visible from the street. Watch for these signs, especially on walls facing the water or shaded from direct sun:
- Persistent moss or dark streaking on siding that doesn't clear up between dry spells
- Soft or spongy spots when you press on the siding near the bottom of walls or under windows
- Paint or finish that's bubbling, peeling, or chalking faster than it should
- Visible gaps or separation at butt joints, corners, or trim boards
- Rust staining running down from fasteners or metal trim pieces
- A musty smell in interior rooms along an exterior wall
- Warping, buckling, or waviness in the siding panels themselves
Any one of these on its own might be minor. Several together usually mean moisture has been getting behind the siding for a while, and it's worth having someone look at the wall assembly, not just the surface.
What Drives the Cost of a Flounder Bay Siding Job
Every home is different, so we're not going to quote numbers we can't stand behind sight-unseen. But the factors below are what actually move the price on a project in this area, and understanding them helps you evaluate any quote you get.
| Factor | Why It Matters Here |
|---|---|
| Wall exposure and orientation | Sides facing the bay or prevailing storm direction often need more careful flashing and detailing, which affects labor time. |
| Condition of existing sheathing | Hidden moisture damage found during tear-off adds repair work before new siding can go on — this is common on older waterfront homes. |
| Home size and wall complexity | Dormers, multiple gables, and varied wall heights all add cutting, fitting, and flashing detail. |
| Siding profile chosen | Lap, panel, and shingle-style James Hardie products differ in material and labor cost. |
| Trim and accessory scope | Corner boards, window trim, and fascia work are often bundled with a siding job and add to the total. |
| Access and site conditions | Waterfront lots with limited access or steep grades can add setup time and equipment needs. |
Why It Matters to Hire a Crew That Already Works This Neighborhood
Siding installation isn't a one-size-fits-all trade. A crew that mostly works inland Skagit County jobs may not think twice about fastener corrosion resistance, moss-prone shaded walls, or the extra care wind-driven rain demands at flashing details — because they don't run into those conditions as often. A crew that regularly works Flounder Bay and the surrounding Anacortes waterfront sees these conditions on every job and builds the details around them as a matter of habit, not an afterthought.
That familiarity also shows up in smaller ways: knowing how local wind patterns affect where water actually hits a wall, understanding which sides of a house need extra attention to joint sealing, and recognizing early warning signs of moisture problems specific to this shoreline environment. It's the difference between a generic installation and one built for the actual conditions your home faces every day.
Maintenance After Installation
James Hardie siding, installed correctly, is low-maintenance — but "low" isn't "none," especially in a salt-air, high-moisture environment. A periodic rinse to clear salt residue and organic buildup, keeping gutters and downspouts clear so water doesn't sheet down the wall face, and trimming back vegetation that shades and dampens siding all help the installation perform the way it's designed to. We're happy to walk through what upkeep looks like for your specific home and orientation once the job is done.
If you're considering new siding for a home in Flounder Bay, or you're seeing early signs of trouble with what's on the walls now, we'll come take a look and give you a straight, no-pressure assessment. There's no cost and no obligation to get an estimate — just a clear picture of what your home needs.